WhatsApp Cloud
This guide walks you through how to integrate a WhatsApp Cloud API with Bevatel's Business Chat system. It includes API setup, webhook configuration, agent assignment, and final channel verification.
Step 1: Choose Your API Provider
-
Navigate to Channels > Add Channel.
-
Under "WhatsApp Channel", select your API Provider:
Example: “WhatsApp Cloud”
Step 2: Enter Channel Details
Fill in the required fields:
-
Channel Name: Choose an internal name for your WhatsApp channel.
-
Phone Number: Your registered WhatsApp Business number.
-
Phone Number ID: Obtain this from your Meta Developer Dashboard.
-
Business Account ID: Found in your Meta Business Manager.
-
API Key: You’ll retrieve this from Bevatel’s Configuration tab (Step 5).
Click “Create WhatsApp Channel” to proceed.
Step 3: Add Agents
-
After creating the channel, you’ll be prompted to assign agents.
-
Select from the list and click Add Agents.
Agents not added here won’t have access to respond to messages on the channel.
Step 4: Finalize Setup – Your Channel is Ready!
You’ll receive a success confirmation screen:
-
✅ “Your Channel is ready!”
-
You may now begin forwarding messages or go to More Settings.
Step 5: Configure Webhook in Meta Developer Account
Before your channel can function properly:
Log in to Meta Developer Portal.
Go to your App Settings > Webhooks section.
Select the WhatsApp Business Account object.
Set the Webhook Callback URL to the one provided by Bevatel.
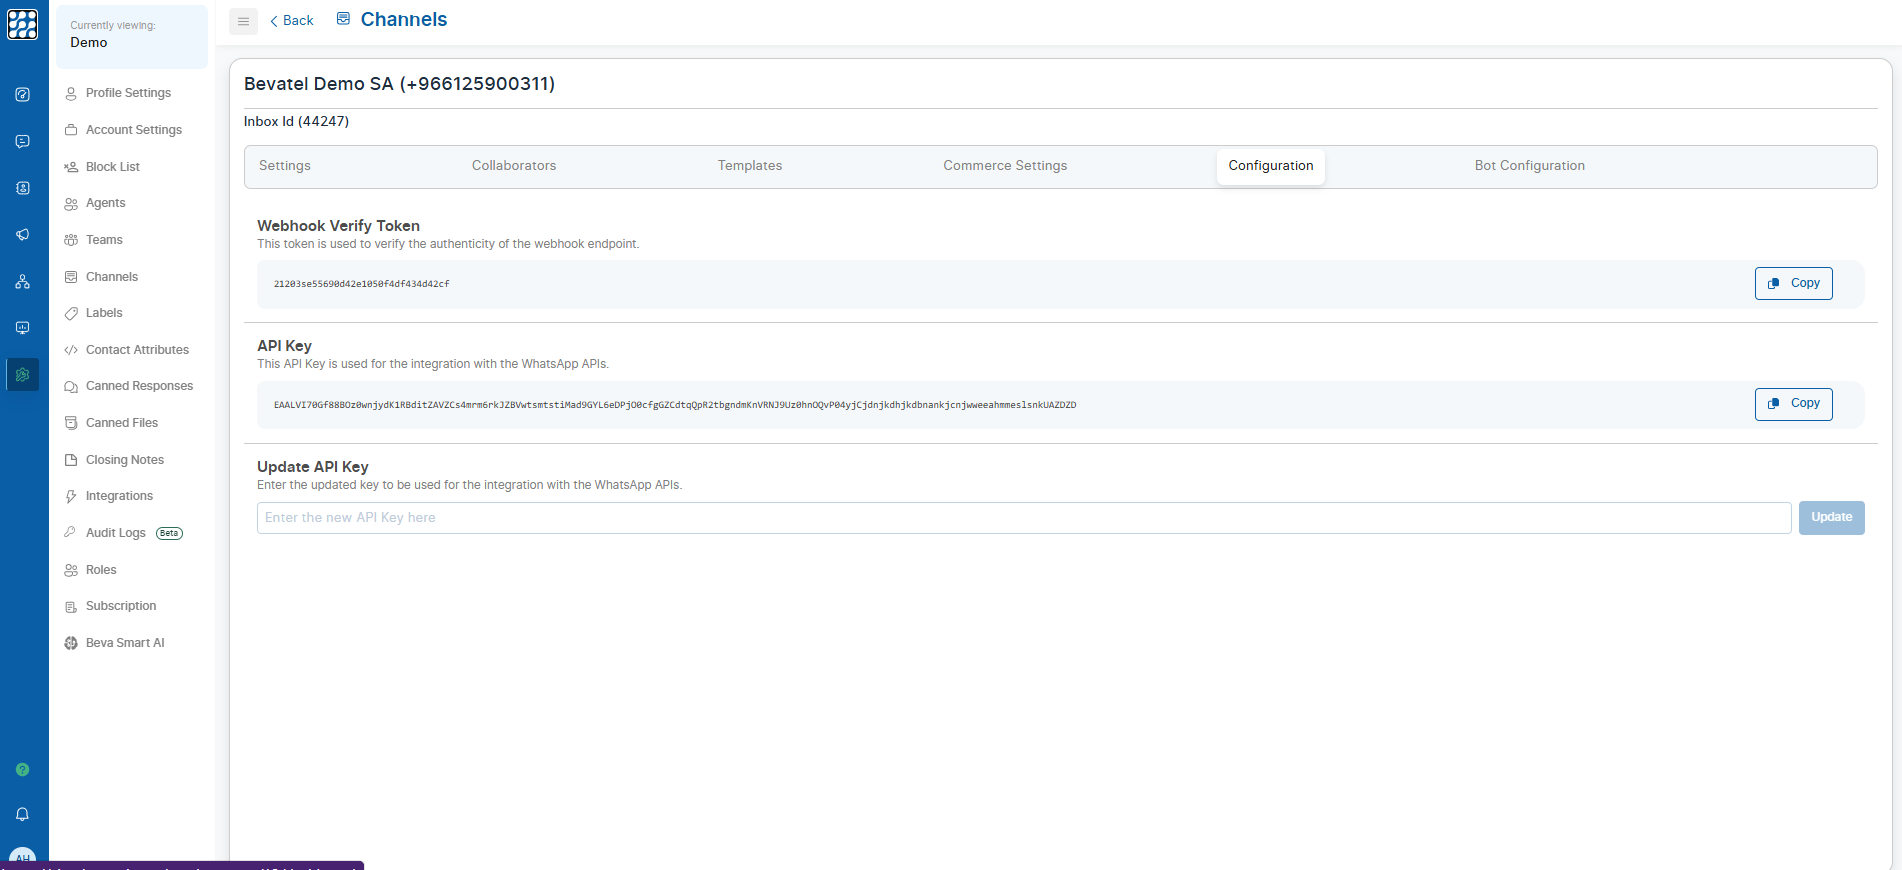
Use the Webhook Verify Token from Bevatel’s Configuration tab to complete verification.
Webhook setup is essential for receiving messages and events from WhatsApp to Bevatel.

Step 6: Access Configuration Details
Log in to Meta Developer Portal.
Go to your App Settings > Webhooks section.
Select the WhatsApp Business Account object.
Set the Webhook Callback URL to the one provided by Bevatel.
Use the Webhook Verify Token from Bevatel’s Configuration tab to complete verification.
Navigate to:
-
Channels > Select your WhatsApp channel > Configuration tab.
You will see:
-
Webhook Verify Token – used during webhook setup on Meta.
-
API Key – used in Step 2.
-
Update API Key – enter a new key here if your old one is rotated or expired.
Related Articles
WhatsApp Campaigns
"WhatsApp Campaigns in Bevatel enable sending WhatsApp campaigns to groups of contacts, with easy setup through campaign details input." WhatsApp Campaigns The WhatsApp Campaigns allow the customer to send a campaign to a group of contacts. Step ...Whatsapp API
Connecting to WhatsApp API via Embedded Signup: Step-by-Step Guide Step 1: Choose Channel Navigate to Channels: On the left menu, select Settings, then Channels. Select WhatsApp API as the channel. Click Continue to proceed with connecting via ...Send Message
"Send messages using WhatsApp templates or session messages with variable support, and consider using it for automated welcome messages, chat menus, and timely responses." Configuration There are two key configurations for sending a message: Send ...Add Channels
"Connect your website and social media accounts like Facebook, Twitter, WhatsApp, and more with Bevatel by adding inboxes. Access this feature through Welcome/onboarding, Settings, or your home screen Add Channels An Inbox connects your website, or ...Introduction
Introduction "Connect Bevatel to multiple channels for unified communication. Manage conversations, collaborate on the go with mobile apps, and explore Bevatel's features in this user guide." Integrate your Bevatel account with multiple conversation ...